ESP8266 Height-Adjustable Desk Control with Home Assistant Integration
Project Overview
The goal of this project is to control a height-adjustable desk from a Home Assistant button while still preserving the functionality of the manual button controls on the table itself.
Prerequisites
These are the exact tools, hardware, and software I used. You can exchange most components with other similar ones.
Hardware
- NodeMCU Lua Lolin V3 Module ESP8266 ESP-12F WIFI Development Board with CH340
- At least 8 jumper wires
- One 2-Channel Relay Module 5V with Optocoupler Low-Level Trigger
- Three WAGO 221 Terminal Block 3 Connectors
- USB-A to Micro-USB cable for powering the board and flashing code
Tools
- Scissors to cut the cable
- Cable insulation stripping tool
Software
- Arduino IDE
- Running Home Assistant instance
Safety Warnings
The instructions contain steps that permanently alter parts of the desk. If not followed properly, they CAN damage the desk controller, engine, and other parts on or around the table. Make sure to remove any items on, around, and under the desk before performing the steps.
The instructions are generally safe to follow, as they deal with low-voltage parts of the table. Nonetheless, be careful and do NOT make any changes to parts that run high voltages. Always check the components with a multimeter before working on them and unplug all cables.
Step-by-Step Guide
Understanding the Desk Controls
The desk controls consist of three cables. The following figures show a schematic view of those cables. The colors are for illustrative purposes and might be different for your specific desk.
The green (left) cable connects the controller with the Raise button, and the blue (right) one connects with the Lower button. One black cable connects both buttons back to the table to form a closed circuit. The open buttons interrupt this loop. Pressing a button closes the respective circuit, letting the desk controller know to start the engine for raising or lowering the table.
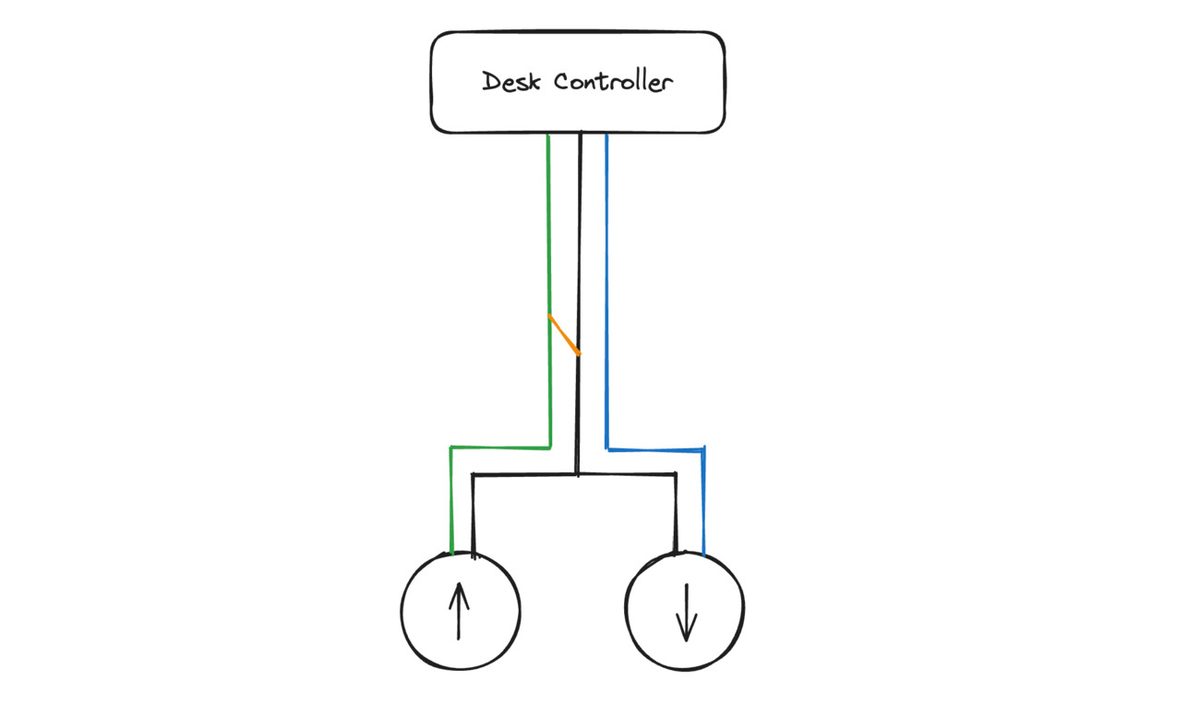
At this point, it’s straightforward to intercept the button presses by directly connecting the green and blue wires with the orange wire, thereby creating a closed circuit before the button is even reached.
Cut the Cable
To get access to the individual cables, cut the cable running from the button controls to the desk, and remove the insulation around it and the individual smaller cables for about 1-2 cm.
Automating a Button Click
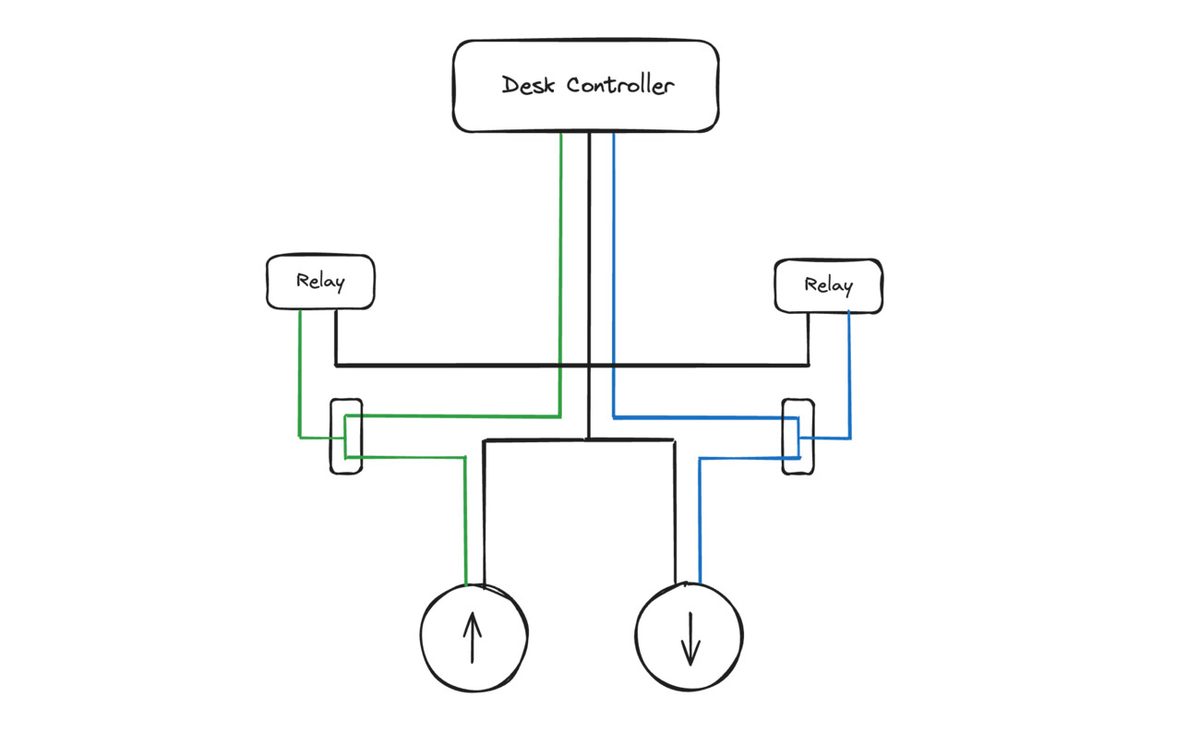
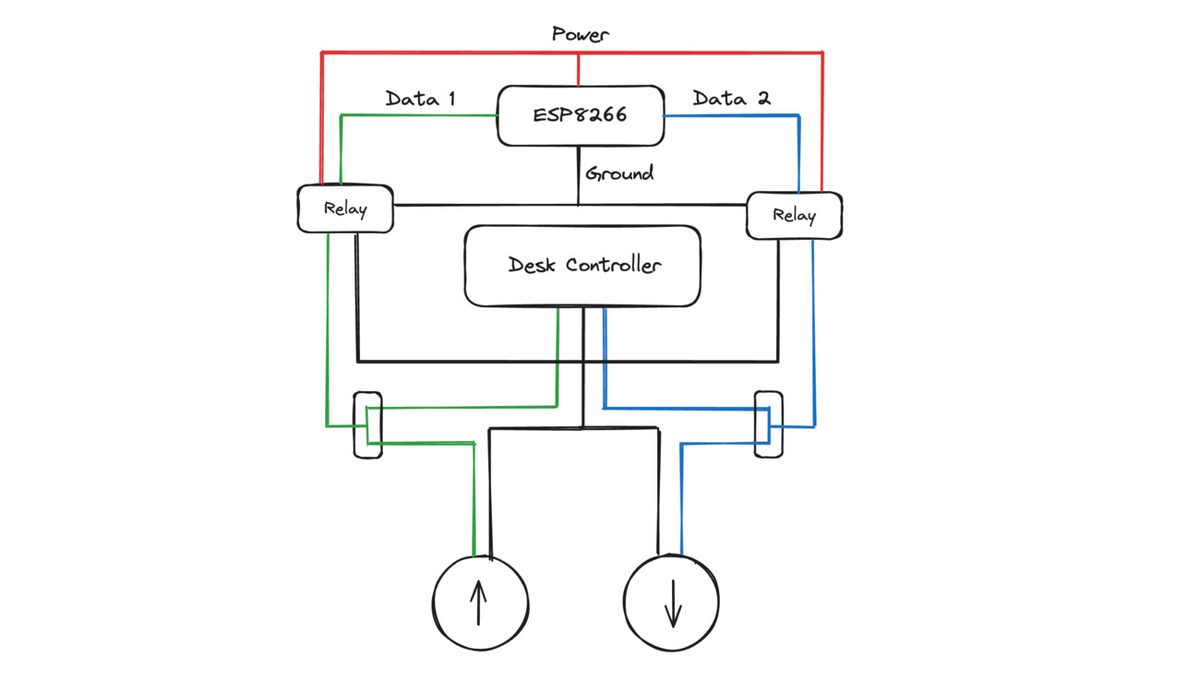
Controlling the Relays
Relays don’t do anything on their own. You need a microcontroller to control them. For example, you can use the NodeMCU ESP8266 development board. The board has to provide power, ground, and two data pins. Each data pin controls one of the relays. Now the circuit is complete, and you can program the ESP.
Programming the Controller
Open esp8266.ino in the Arduino IDE and set all configuration variables.
Home Assistant Setup
1. Install MQTT Broker
- Install Mosquitto Broker Add-on
- Start Add-on with default configuration
- Add new
mqttuser underSettings > Peopleand allow login
2. Add MQTT Integration
- The MQTT integration should appear under
Settings > Devices & services - Add the integration
- Here you can try publishing packets to the
desktopic. Set your payload todownorup.
3. Add Switch in Home Assistant Configuration
Use the Text Editor add-on to edit the configuration.yaml file of your Home Assistant instance. Add the following entry to the file.
mqtt:
  switch:
    - name: "Desk Switch"
      unique_id: desk_switch
      command_topic: "desk"
      payload_on: "up"
      payload_off: "down"
After restarting Home Assistant, this will add a new switch device that sends up and down payloads to the desk MQTT topic.
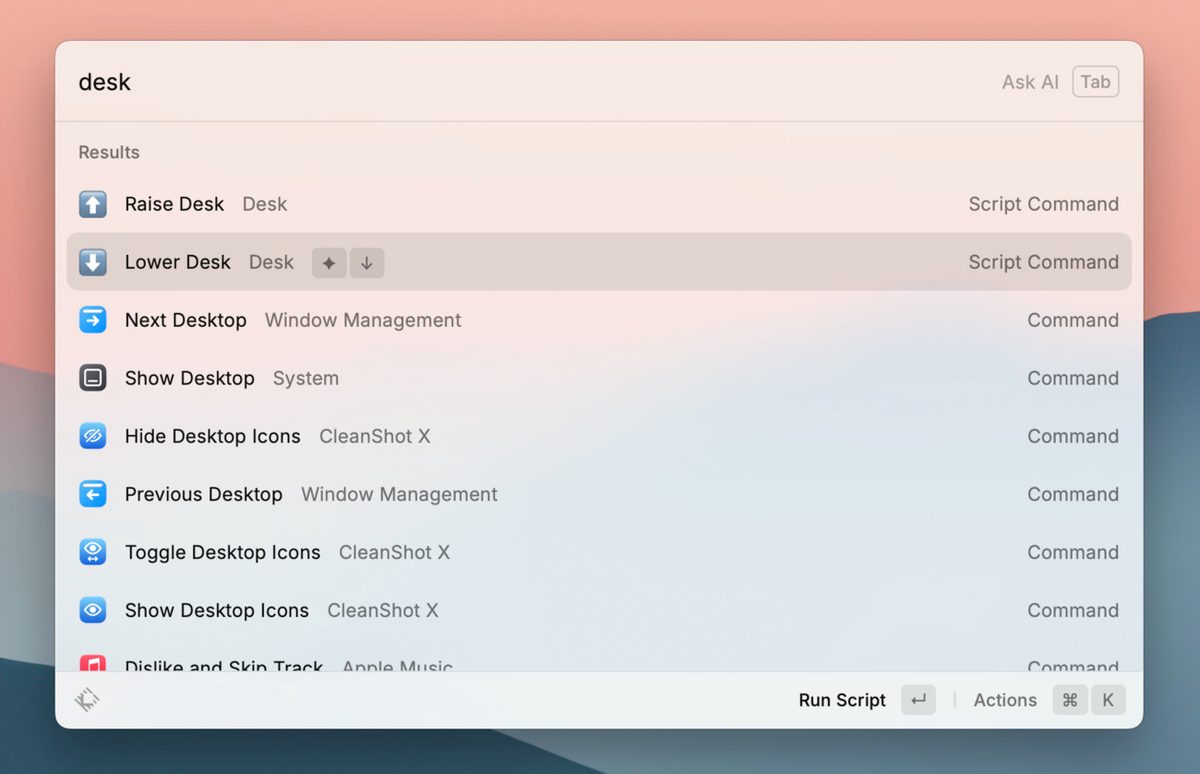
Optional Raycast Integration
The repository includes two python files that you can include in a script commands directory for Raycast. They will add the commands ⬆️ Raise Desk and ⬇️ Lower Desk.
Install
To use the scripts, install the MQTT python client.
pip install paho-mqttThen change the shebang line to point to the Python environment where you installed the client, set the MQTT broker hostname, user, password, and add both Python scripts to your script commands directory. You should now be able to raise and lower your desk from Raycast 🎉.